Here’s the perfect tutorial on how you can change, update and manually configure DNS tcp/ip Settings in Windows 7, 8, 8.1, Win 10, Vistaor XP. There could be different reasons for changing the DNS (Domain Name Servers) addresses manually. If you are facing low internet speed then a fast DNS can solve the problem to some extent.
Why you should change the DNS in Windows ?
With custom DNS you can block have safe browsing, there are some DNS providers which block the access to Adult websites. You can gain more internet speeds with better and fast DNS ( Google and Open DNS are popular). So more or less there are many reason for which you should know how to manually set DNS and how to check DNS tcp/ip4 settings in Windows Computer.
Change DNS TCP/IP Settings in Windows
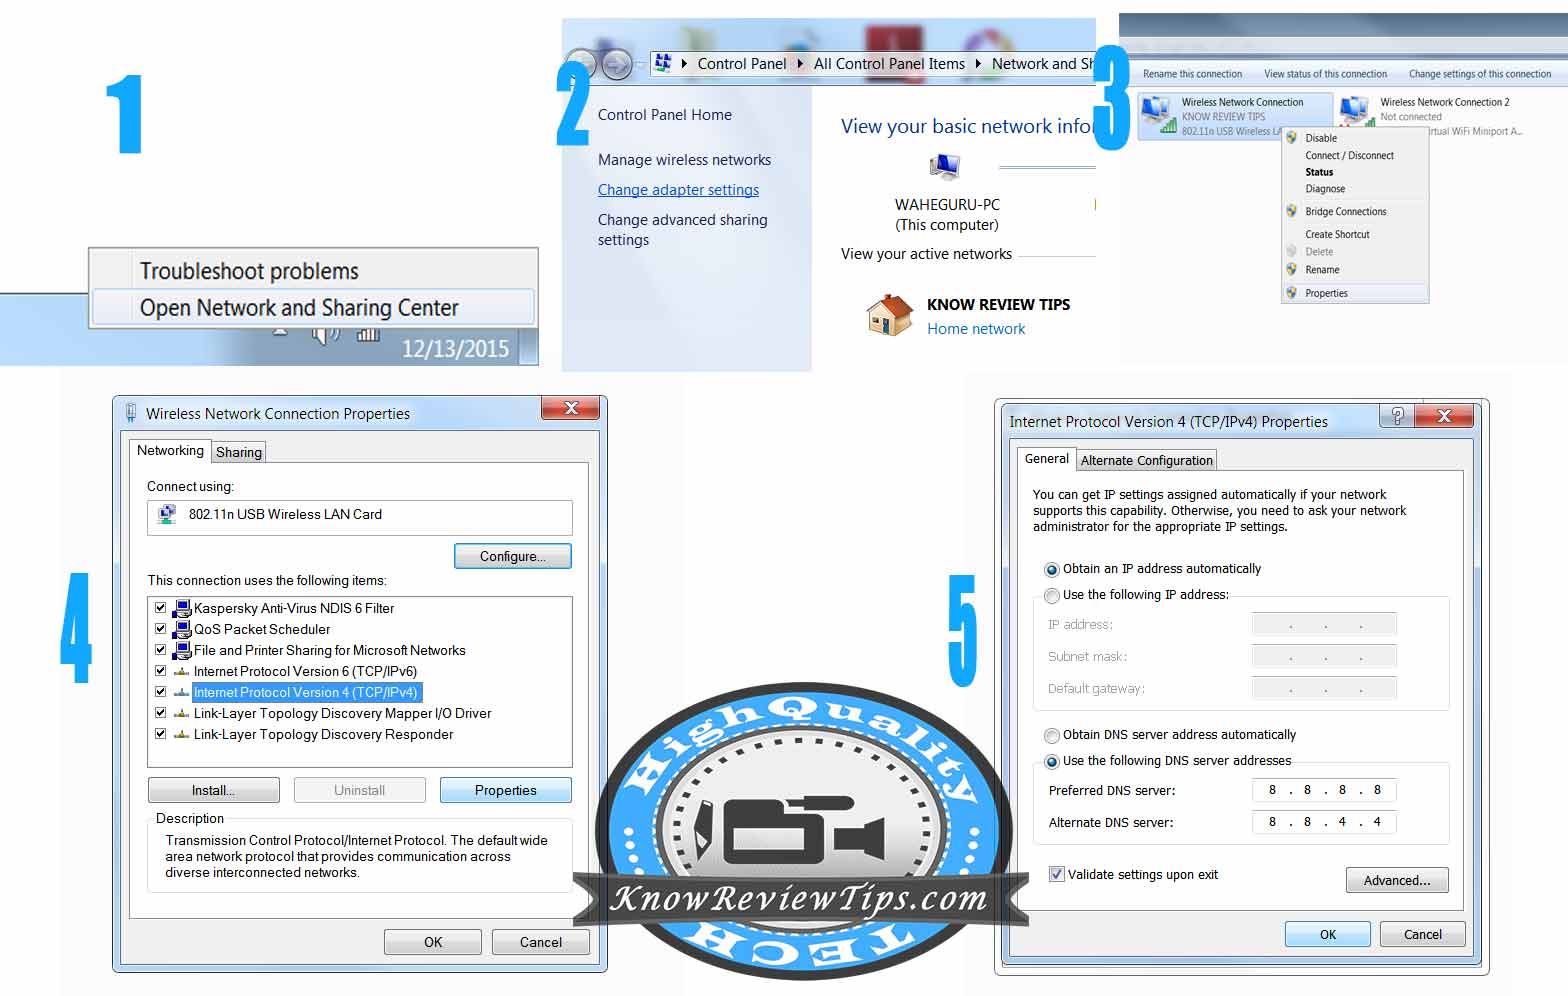
Step 1: Right Click on the Network ICON in the Taskbar, Click on “Open Network and Sharing Center“.
Step 2: Click on Change Adapter Settings in the newly opened Window
Step 3: Now Select your Working Internet Connection and Right Click on it and Select Properties.
Step 4: A small Window will pop up from there Select “Internet Protocol Version 4 (TCP/IPv4)” (under Network) and click on Properties.
Step 5: Now choose the option “Use the Following DNS Server Addresses” after that fill the Google’s Popular DNS.
Preferred DNS Server: 8.8.8.8
Alternate DNS Server: 8.8.4.4
Step 6: Select “validate Settings upon Exit” and finally click on OK button.
The above method to change or update DNS settings will work on Windows 7, Win 8 / 8.1 Windows 10, XP and Vista.