If the Windows Search on your computer in not working or is disabled, here the complete tutorial on how you can fix it or restart the Windows Search service manually in Win 10 / 7 / 8 / Xp. If the search bar is being displayed in Start Menu and Windows Explorer but is not showing results or is crashing then troubleshoot it using Windows Search Fixer.
Some users manually disable the Windows Search service to increase the performance of their PC, but as it is great and beneficial service so most of the users keep it enabled. The process to Stop or Restart the Windows Search service if very easy, simply follow the below steps:
Enable or disable Windows Search service using Control Panel:
- Go to Control Panel
- Click on “Administrative Tools”
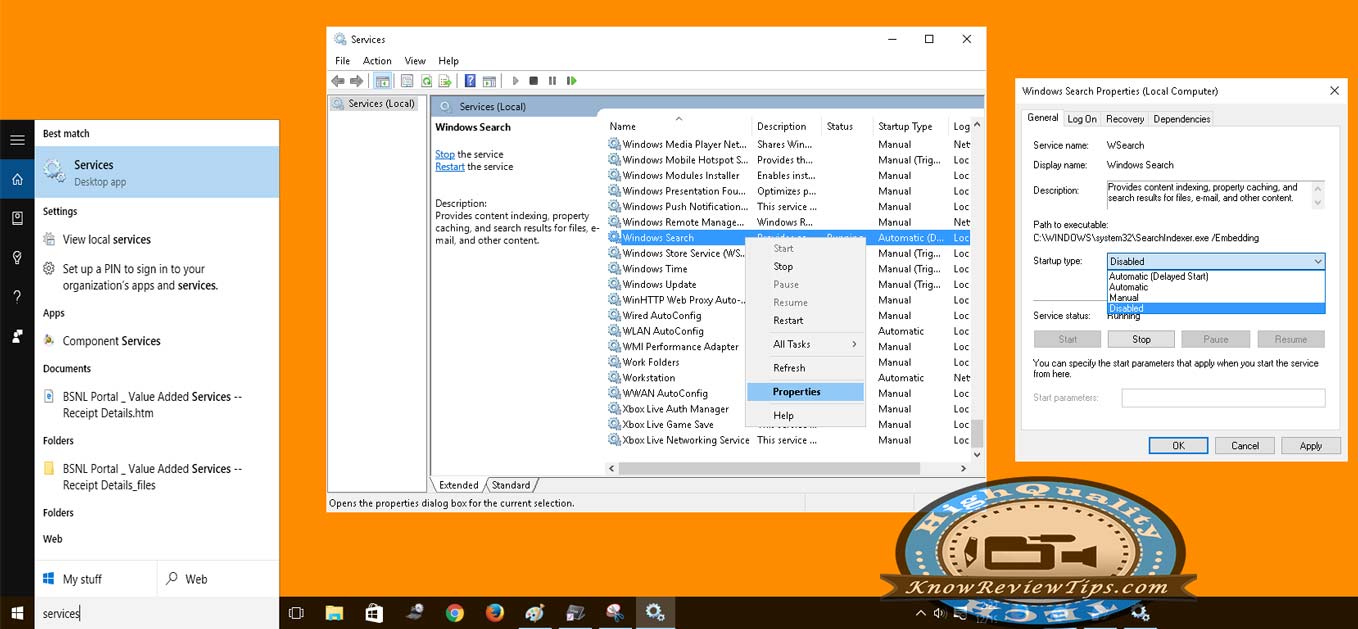
- Now Select “Services“
- Now from the newly Opened Services Window Scroll down to “Windows Search“
- Right Click on Windows Search and Click on Properties
- Now in General TAB under Startup Type option select the Desired option from “Manual / Disable / Automatic / Delayed Automatic”
Enable Windows Search service using RUN:
- Open RUN
- Type “services.msc”
- Scroll down to “Windows Search”
- Right Click on Windows Search and Click on Properties
- Now in General TAB under Startup Type option select “Automatic”
You can also go to Windows Services by Searching “Services” in Start Menu and following the rest of the steps. Also know how you can enable or disable Microsoft Windows Services.