Today we will know how to start or stop Windows Services in Microsoft Windows 10 / 7 / 8 / XP. There could be several reasons for enabling or disabling the Windows Services. You can decrease the system functionality by disabling the services in order to increase system performance or decrease startup / windows load time.
You can re-start services to re-gain the functionality of the services. To enable or disable any Microsoft Windows Service first you have to reach or open “Services” window. To open Services window there are mainly three methods / ways: by default search, via control panel or by RUN command.
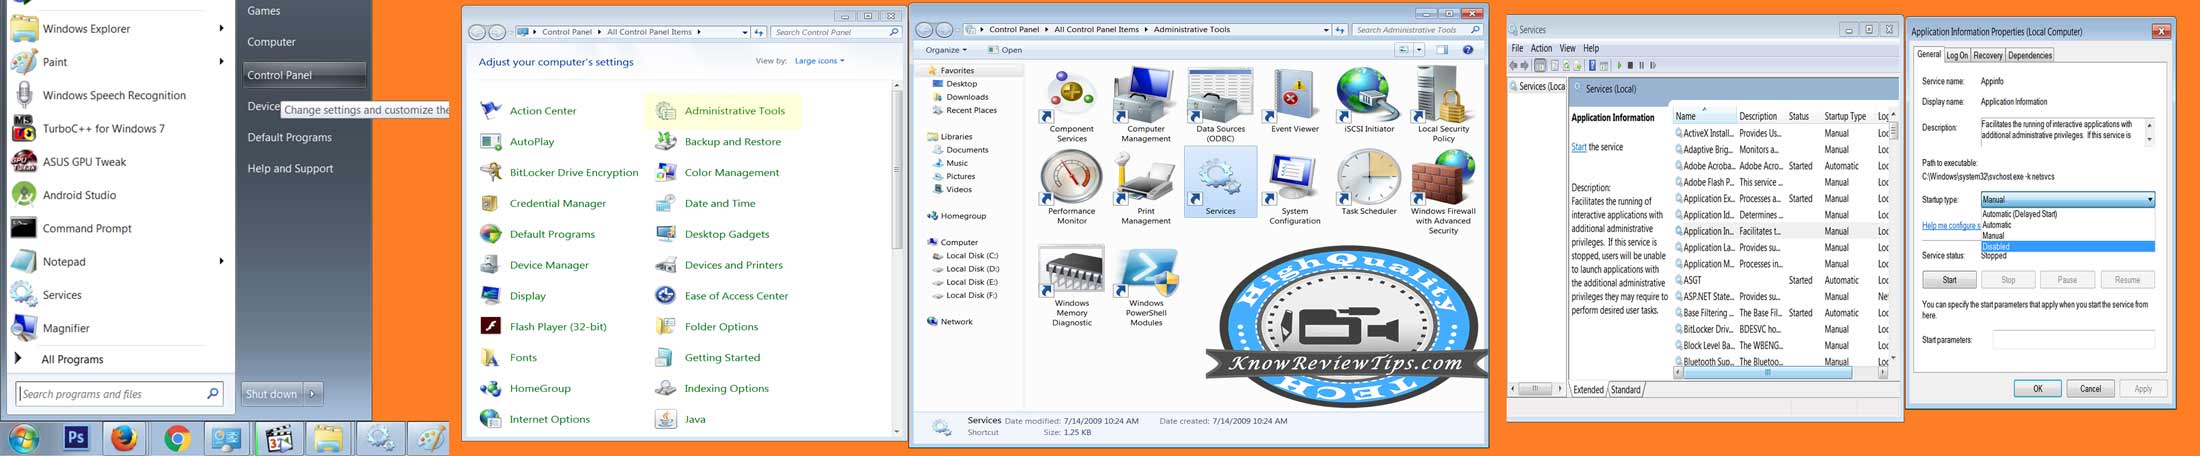
Start or Stop Windows services in Windows
Enable or disable Windows services using Control Panel:
- Go to Control Panel
- Click on “Administrative Tools”
- Now Select “Services“
- Now from the newly Opened Services Window Scroll down to the service you want to enable or disable
- Right Click on Windows Search and Click on Properties
- Now in General TAB under Startup Type options select the Desired option from “Manual / Disable / Automatic / Delayed Automatic”
- Click Apply and OK
Re-Start or Stop Windows service using RUN:
- Open RUN
- Type “services.msc“
- Scroll down to the Service you want to start or stop
- Right Click on Windows Search and Click on Properties
- Now in General TAB under Startup Type select desired option
- Click on APPLY Button
You can also open Windows Services by Searching “Services” in Start Menu and following the rest of the steps as mentioned above. Do let us know if you face any problem during the process to enable or disable windows services.